Deflasking is the moment a plant that has spent its whole life in a sealed container of sugar jelly has to start living in a pot. Get the handful of things right and it barely notices. Get them wrong and it melts in a week. Here's what the gel is, why the roots it comes with can't do the job yet, and how to bring a lab plant into a normal room without shocking it.
The plant that has never met the weather
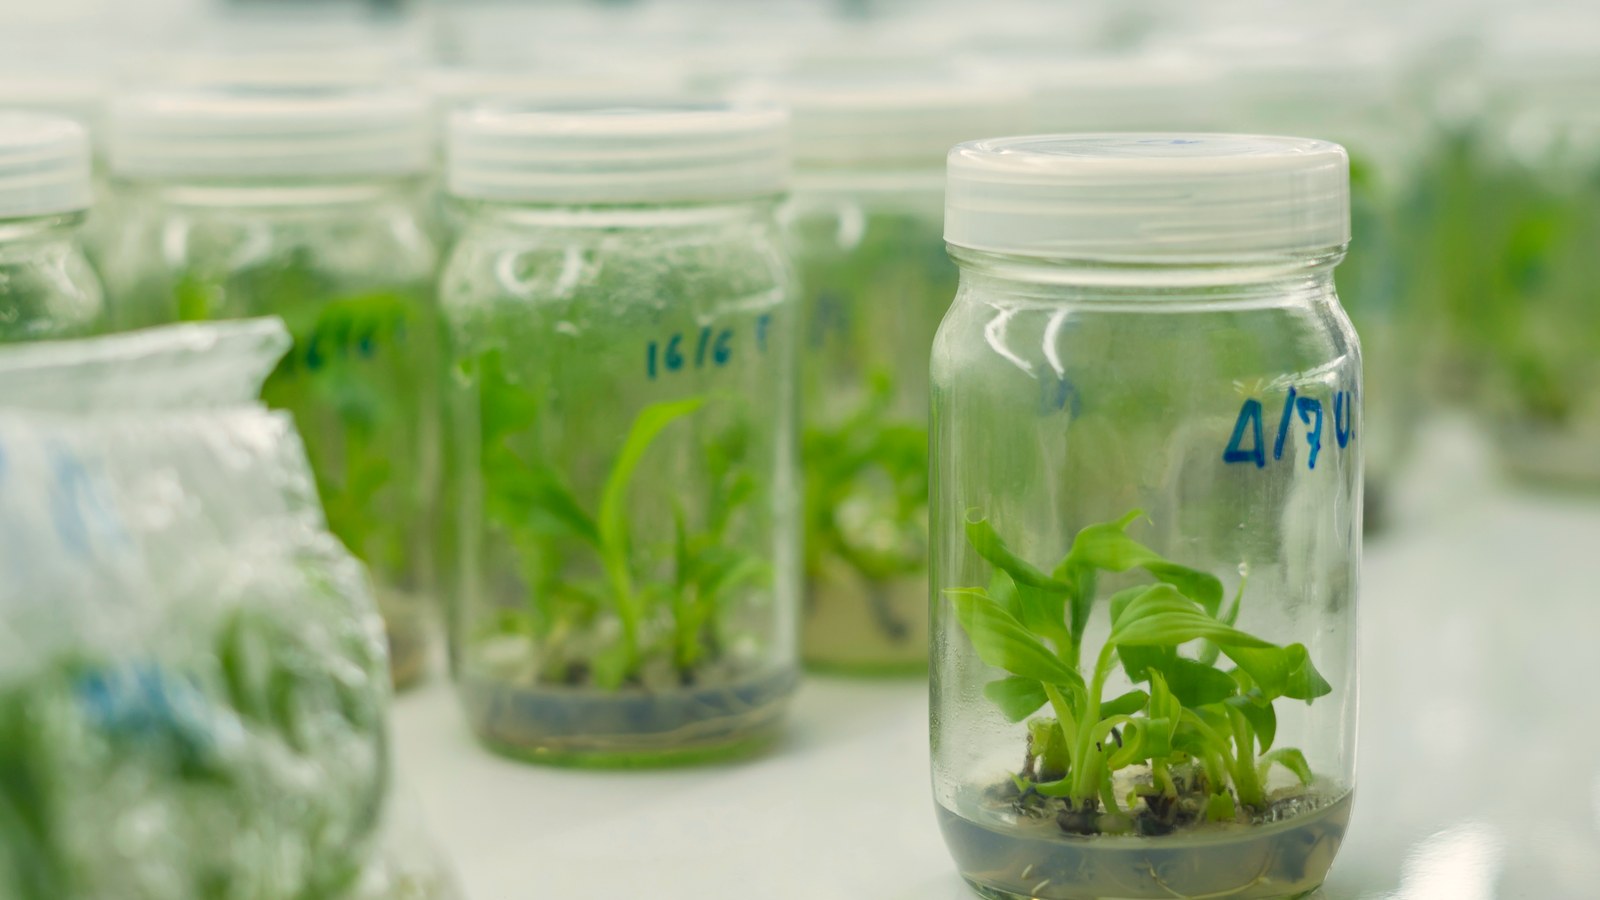
A tissue-culture plant is grown from a few cells in a sealed, sterile container, on a jelly of water, mineral salts, and sugar. It's a clean way to make a lot of plants from very little, and it's how most of the newer rare aroids reach growers. The catch is that everything about that plantlet was built for the flask and nothing about it was built for your house.
Inside that container the air is nearly saturated, the light is dim, and there's sugar to eat, so the plant never has to make its own food or hold onto water. It comes out with soft leaves, pores that don't close, and roots that mostly anchor rather than drink (Chandra et al., 2010). Deflasking, sometimes called acclimatization or ex vitro transfer ("ex vitro" just means out of the glass), is the job of walking that plant from the flask into the real world without losing it in the first week.
I ordered two as sealed lab cultures to run the whole thing on camera: a Batwing Alocasia (Alocasia nycteris) and a Monstera sold under the trade name 'Devil Monster.' The steps below are the same for almost anything you'll deflask.
Watch: the full deflasking
The written protocol runs alongside the video from here. If you only remember one thing, remember the gel.
Why the gel has to come off
The clear jelly the plantlet sits in is culture medium: mostly water and mineral salts, set with agar (a seaweed gum), and carrying sugar because the plant can't yet photosynthesize enough to feed itself. That sugar is the problem the moment the plant leaves its sterile container.
Out in the open, any smear of sugar-rich medium left on the roots is an open buffet for fungi and bacteria, and they'll bloom on it far faster than the plantlet can. Meanwhile the plant's own roots are in no shape to defend their patch of substrate (Chandra et al., 2010). So the first real step is to rinse every trace of gel off under a gentle stream of room-temperature water, working it out of the crown and off the roots until the water runs clear and the roots feel clean rather than slick. This isn't fussiness. It's the single most common reason a deflasked plant is fine on day two and mush on day seven. For an extra margin, some growers follow the rinse with a brief dip in dilute povidone-iodine, an antiseptic that clears fungal spores and biofilms even at low concentrations (Capriotti et al., 2018). It's the disinfecting step in the protocol below.
The roots it arrives with barely work
It's tempting to treat those pale little roots as precious. Handle them gently, but don't count on them. Roots formed in culture are often built wrong for soil: they can lack the fine root hairs that do most of the actual water uptake, and they frequently don't connect cleanly to the shoot's plumbing (Chandra et al., 2010). Their real job right now is to hold the plantlet steady in the mix.
The roots that will keep the plant alive are the ones it grows after you pot it, once it's in air and reaching for water. That's why the next two steps, the mix and the humidity, matter more than anything you do to the existing roots. Separate multiple plantlets by teasing them apart at the base, trim only what's obviously dead, and move on.
A mix that breathes
New roots need oxygen at least as much as they need water, and a deflasked plant has almost no margin for a soggy pot. The mix should drain fast and stay chunky so air can move through it. In the video I potted into Fluval Stratum (a fired-clay aquarium substrate) cut with perlite, which gives big pore spaces and lets water run straight through instead of pooling around the crown.
You don't need that exact recipe. Any open, low-richness medium works: fine bark, pumice, perlite, coco chunks, in some combination. What you're avoiding is dense, water-holding potting soil, which is how a plant with weak roots and a wet base ends up rotting. Pot shallow, firm the mix just enough to hold the plant upright, and stop there.
Weaning it off the greenhouse
Here's the part people rush, and it's the part the science is clearest on. Leaves grown in a saturated flask are made without proper defenses against drying out: the waxy skin (cuticle) on the leaf is thin or missing, and the pores (stomata) that should snap shut to save water often can't (Mohammed et al., 2023; Sharma et al., 2023). Drop that plant into normal room air and it loses water through every leaf with nothing to stop it, while its half-working roots can't refill fast enough. It wilts, and often it doesn't come back (Mohammed et al., 2023).
The fix is to keep the air around the plant humid at first, then lower it slowly. A clear humidity dome, a cup, a bag propped off the leaves, or a covered tray all work. Keep it closed for the first few days, then crack it a little wider each day over roughly two weeks, so the plant is nudged into building a real cuticle and working stomata before it ever meets full room air (Chandra et al., 2010). Keep it out of direct sun during this stretch, since bright light on a plant that can't cool itself only adds to the water stress. By the time the dome is off, the plant should be pushing a new leaf or two that were grown in your conditions, and those are the ones that will carry it.
The protocol, step by step
- Open the flask and free the plantlets. Ease them out of the vessel and gently lift the clump of gel and roots out in one piece.
- Rinse off every trace of gel. Under a gentle stream of room-temperature water, work all the medium out of the crown and off the roots until the water runs clear.
- Separate and tidy. Tease multiple plantlets apart at the base. Trim only clearly dead tissue. Leave the healthy roots alone.
- Give it a brief disinfecting soak. Dip the rinsed plantlets in a dilute iodine bath (2 to 3 drops of povidone-iodine per cup of distilled water) for a minute or two, then lift them out. It's a light sterilizing step that knocks back the surface fungi behind damping-off, the rot that fells young plants at the base.
- Pot into an airy mix. Fast-draining and chunky (Fluval Stratum and perlite, or bark and pumice). Pot shallow, firm just enough to stand the plant up.
- Water in lightly and cover. A small drink to settle the mix, then a humidity dome or bag kept closed.
- Wean over about two weeks. Bright indirect light, no direct sun. Open the cover a little more each day until the plant is living in open air and growing new leaves.
Predictable mistakes
The reliable ways to lose a deflasked plant are all versions of the same two errors. Leaving gel on the roots gives fungi a head start you can't win back. Skipping the humidity weaning (potting up and setting the plant on an open shelf) asks a leaf with no cuticle to survive an environment it was never built for. Two smaller ones round it out: a heavy, wet mix suffocates the new roots before they establish, and direct sun during acclimatization cooks a plant that can't yet regulate its own water. Get the gel off, keep it covered and shaded, give the roots air, and most plantlets walk right through the transition.
The takeaway
Deflasking looks delicate, and the plantlets are, but the method isn't complicated. You're translating a plant from a world of sugar and saturated air into one where it has to feed and water itself, and you're giving it a couple of weeks of cover to catch up. Rinse the gel, give it a quick disinfecting soak, pot into air, and lower the humidity slowly. Do those few things and a plant that spent its whole life in a container will settle into your windowsill like it was always yours.
Capriotti, K., Pelletier, J., Barone, S., & Capriotti, J. (2018). Efficacy of dilute povidone-iodine against multi-drug resistant bacterial biofilms, fungal biofilms and fungal spores. Clinical Research in Dermatology: Open Access, 5(1), 1–5. [link]
Chandra, S., Bandopadhyay, R., Kumar, V., & Chandra, R. (2010). Acclimatization of tissue cultured plantlets: From laboratory to land. Biotechnology Letters, 32(9), 1199–1205. [link]
Mohammed, M., Munir, M., & Ghazzawy, H. S. (2023). Design and evaluation of a smart ex vitro acclimatization system for tissue culture plantlets. Agronomy, 13(1), 78. [link]
Sharma, N., Kumar, N., James, J., Kalia, S., & Joshi, S. (2023). Strategies for successful acclimatization and hardening of in vitro regenerated plants: Challenges and innovations in micropropagation techniques. Plant Science Today, 10(sp2), 90–97. [link]